Search for answers or browse our knowledge base.
Setting up the computer
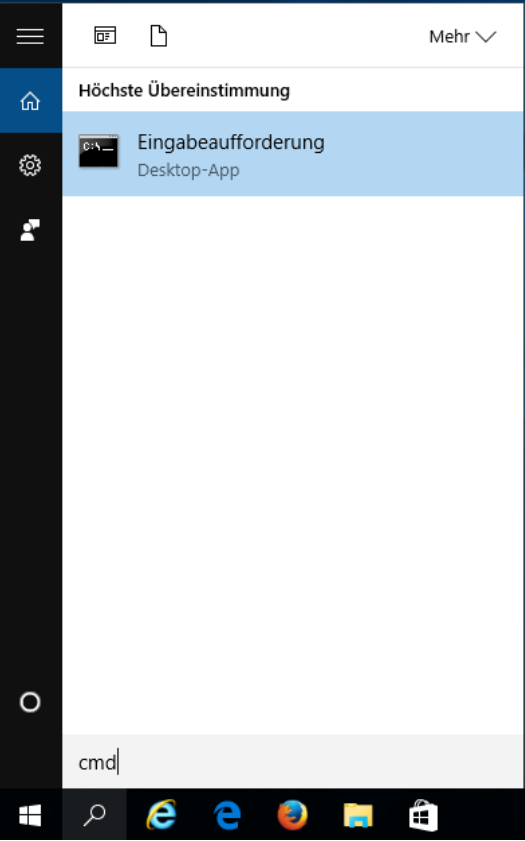
In the search field of the Start menu, type “cmd” and press “Enter”.
Enter the following command in the command line: “net config workstation”
after entering the command please press “Enter”.

The username is displayed in the ” Username . In our example: james.smith Make a note of the username.
Note: If the PC is in a domain, the user name consists of “ logon domain” \ “ user name ”. e.g. MRHPCW10 \ james.smith 4
The host name is displayed in the “ Computer name ” line. The characters “ \ \ ” are omitted . In our example: “ MRHPCW10 ” Make a note of the host name.
Now enter the following command “ipconfig” in the command line . Then press “Enter”.
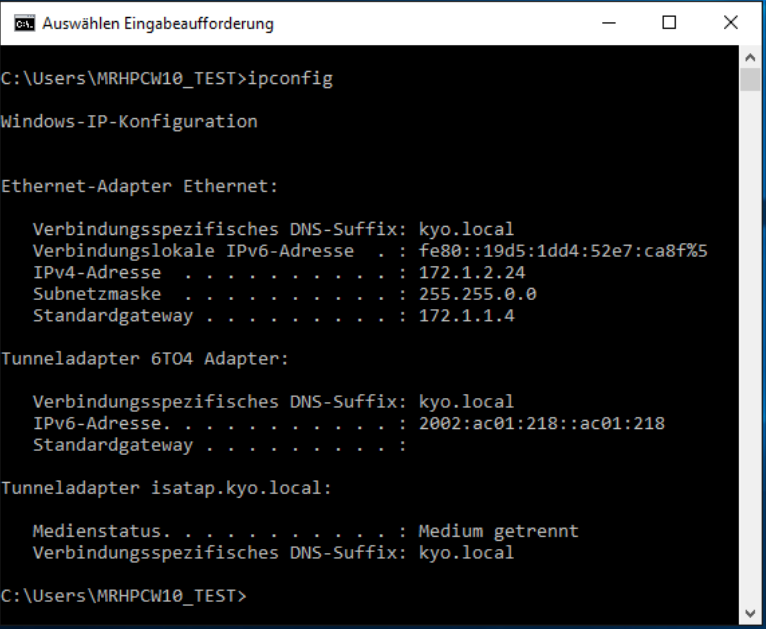
The IP address of the PC is displayed in the “Ethernet Adapter Ethernet” section (name may vary) under “IPv4 address”.
In our example: “172.1.6.15”
Now you need the IP address of the multifunction system.
Make a note of the IP address of the multifunction device.
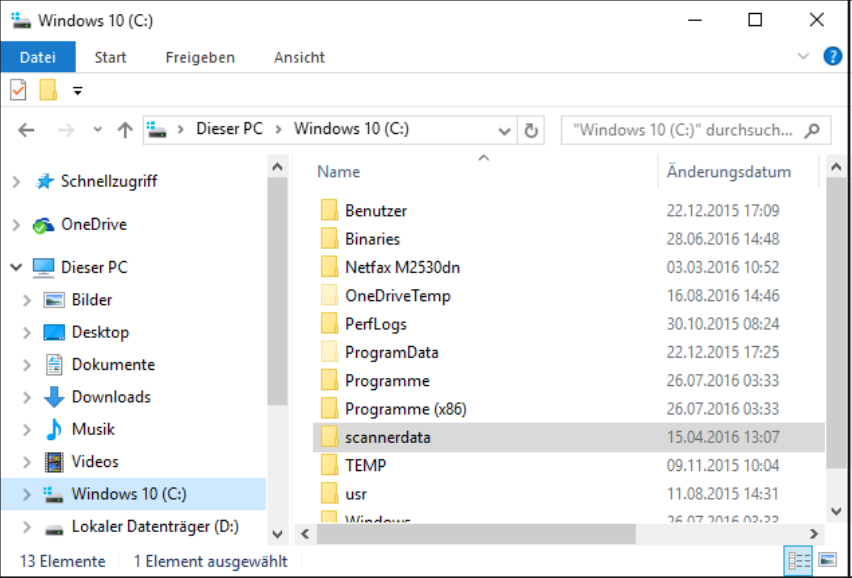
Create and share folders :
Create a directory on the local drive ©.
E.g. “ C: \ scannerdata “ It is
NOT recommended to create the folder in the user profile (e.g. in
the “ Documents ” folder) , as this may lead to permission problems.
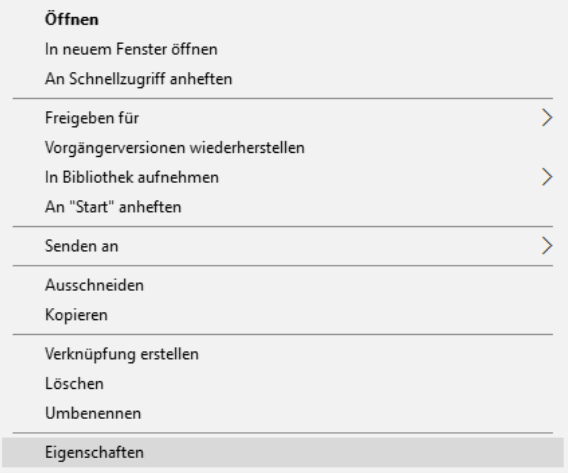
Right-click on the “ scannerdata “ directory and then “ Properties” .
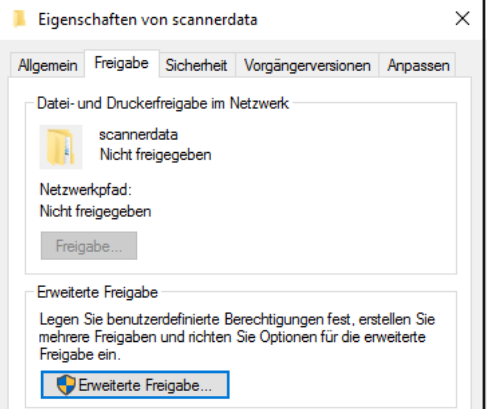
Now select the “ Sharing ” tab and click the “ Advanced Sharing ” button .
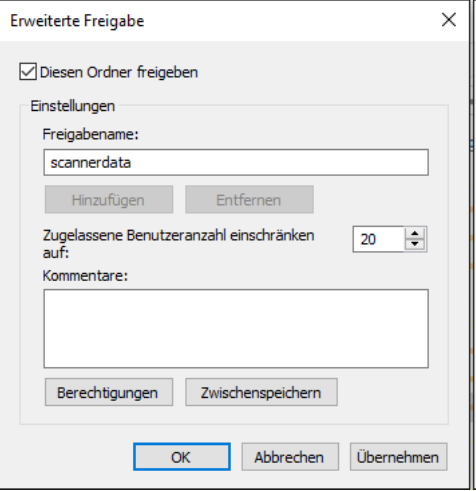
Check “ Share this folder” and leave the share name as is. Click “ Permissions ” .
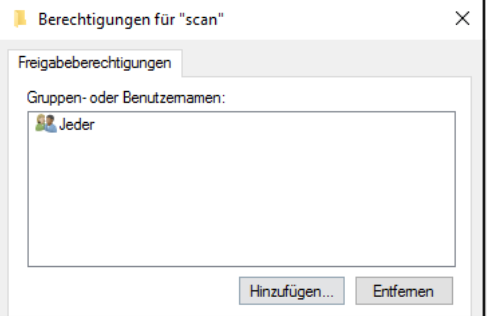
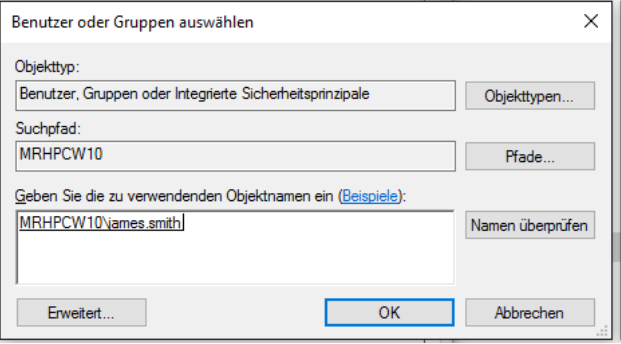
Now click on “Add”
and enter the previously determined user name in the text box.
Then click on ” Check names” . The entered name will now be underlined and, if necessary, supplemented with a domain . If this does not happen, please check the spelling. Then confirm your entry with “OK ” .
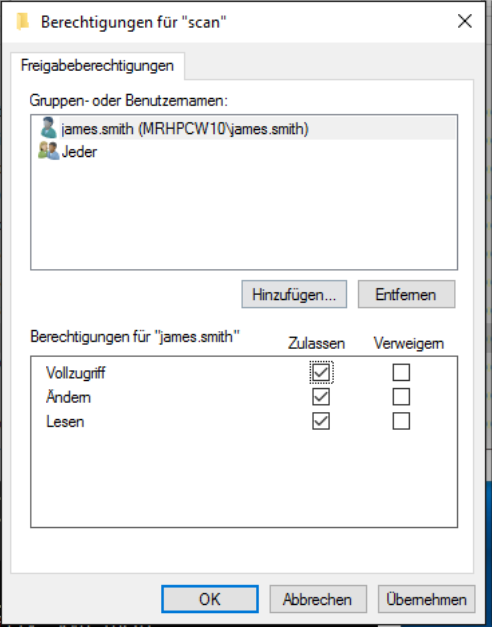
Make sure that the user (in our example “ james.smith ”) has the permissions “ Full Control ”, “ Modify ” and “ Read ” and confirm the changes with “ OK ” .
The device setup
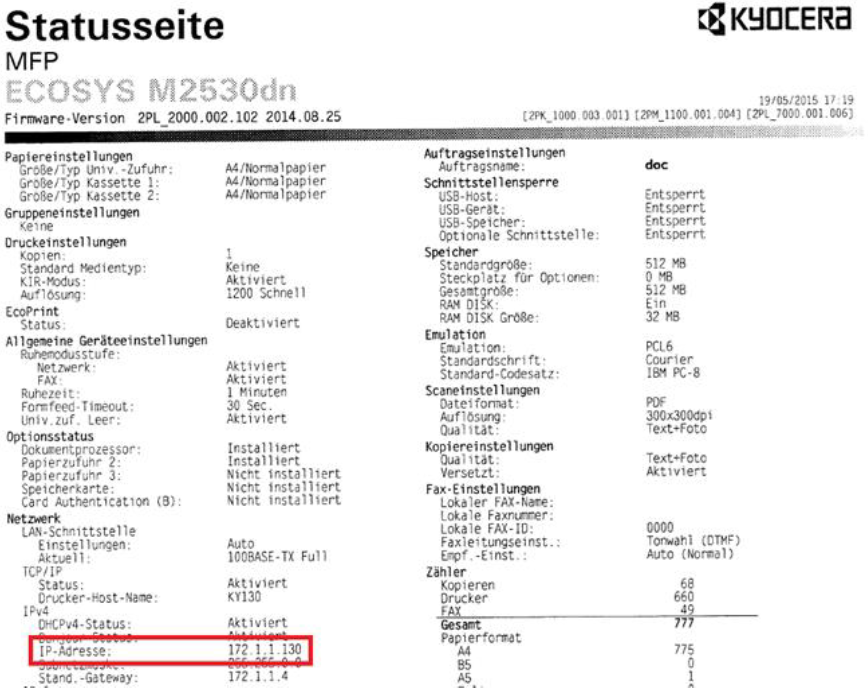
Press the ” System Menu” button on the multifunction device and navigate in the menu to ” List print – Print report – Print status page” and confirm
with “Yes” . You can find the IP
address on the printed status page under ” Network – IPv4 – IP address “. In our example: 172.1.1.130
Enable SMB protocol
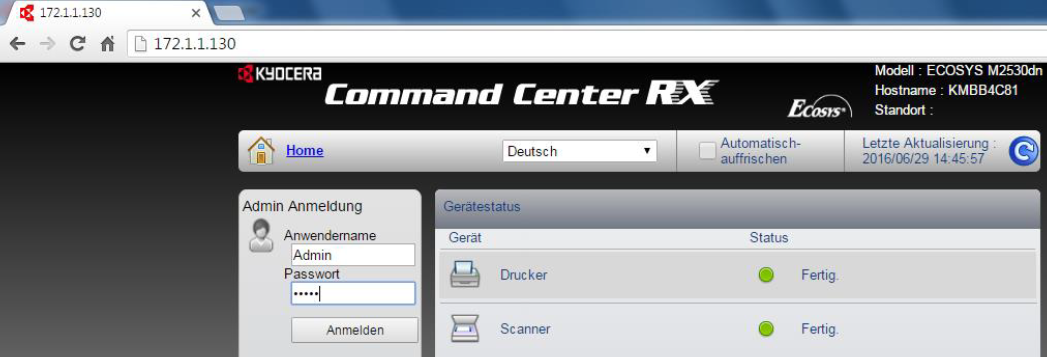
First, open your web browser on your PC. Then enter the IP address of the multifunction device in the address bar and press “ Enter ”. To log in, select “ Admin ” as the user name and “ Admin ” as the password. Now click on “Login”
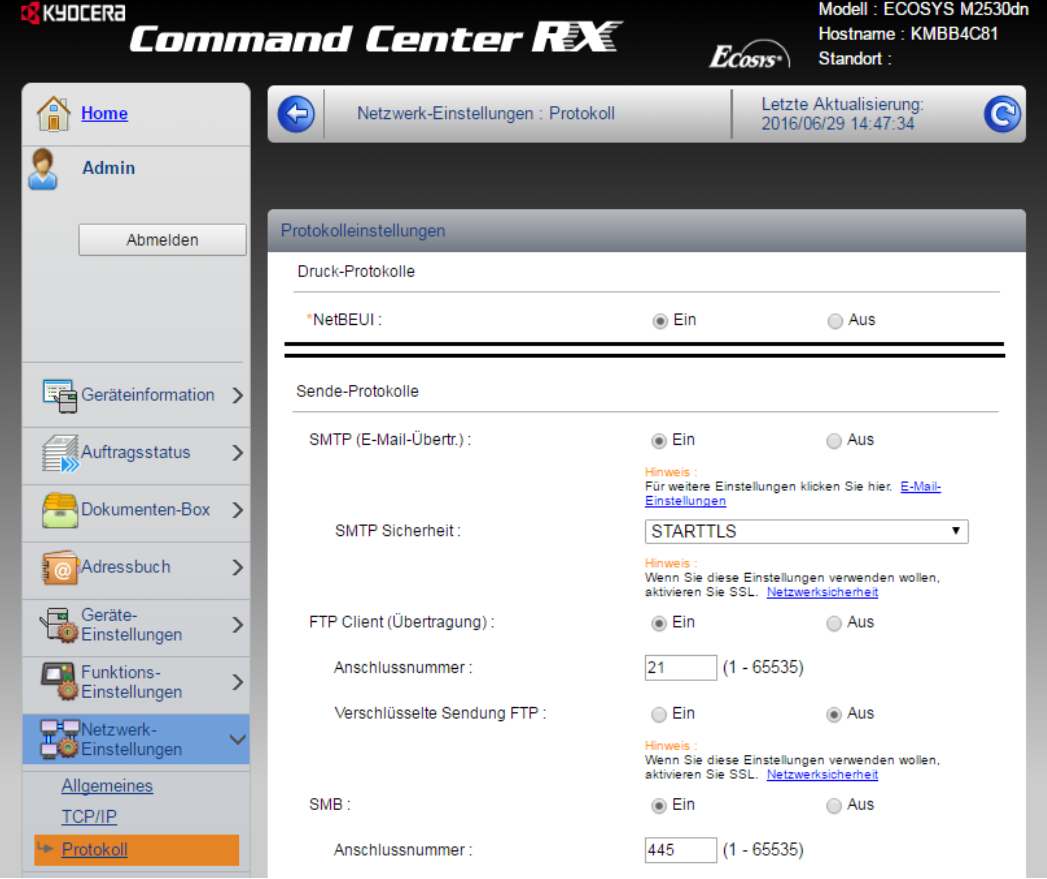
Now select “Network Settings” and “Protocol” in the menu on the left.
Scroll down to the Send Protocols chapter and set the following settings:
“SMB:” ON
Port number:
- 445 for all current operating systems
- 139 for older operating systems (Windows XP and older)
Then scroll to the end of the page and confirm your entries by clicking on “Send”.
Create address book entry
Now select “ Address book – local address book” from the menu bar on the left and then “ Add ” .
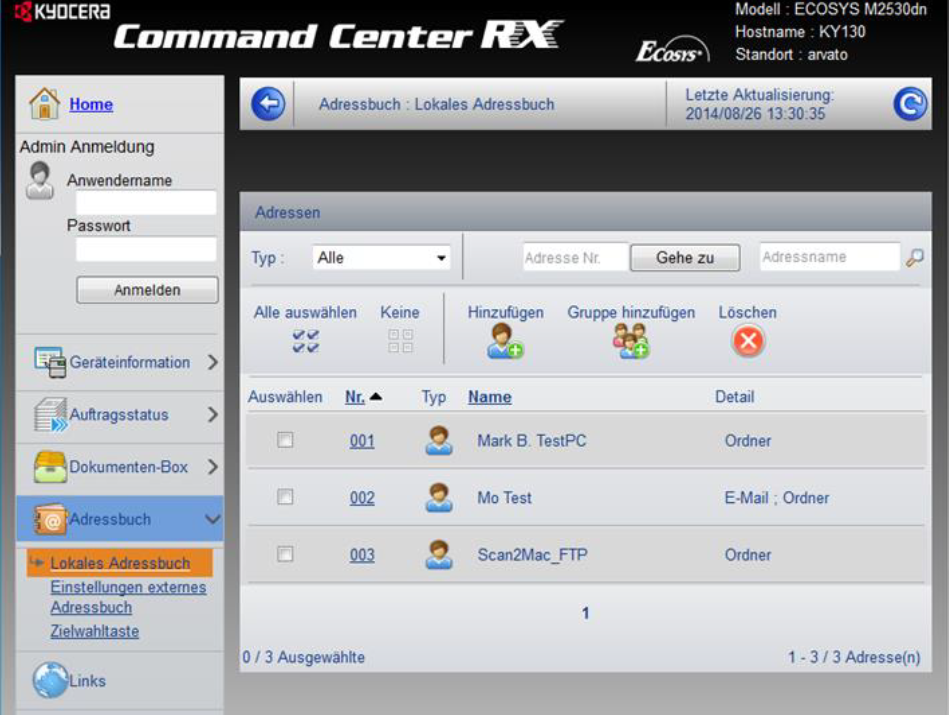
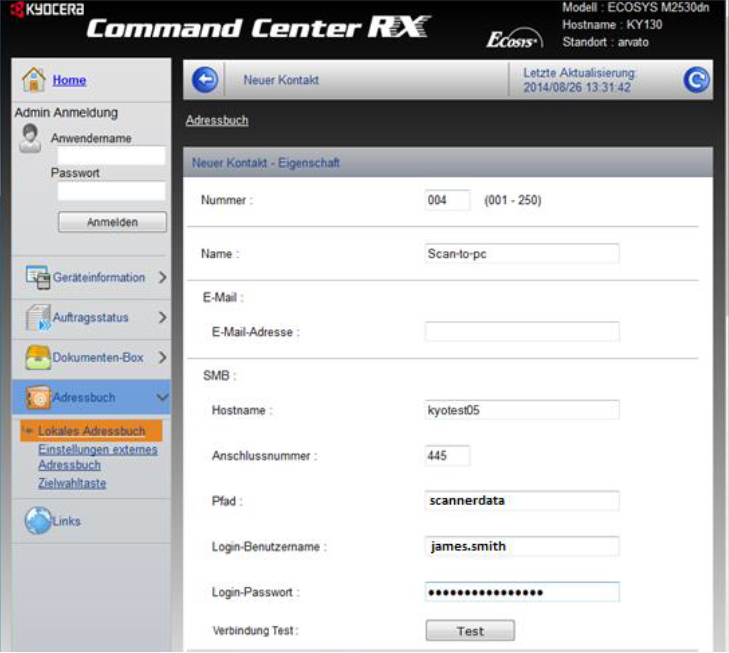
Now enter the required data.
Name: Any name to find the entry again later.
In the SMB section (the other sections do not need to be filled in)
Hostname : the hostname of the computer on which the share is located
Port number:
- 445 for all current operating systems
- 139 for older operating systems (Windows XP and older)
Path: corresponds to the folder name Login
user name: User name of the computer account Login password
: corresponds to the password of the user account specified
Then scroll all the way down and save your entries by clicking “ Send” .
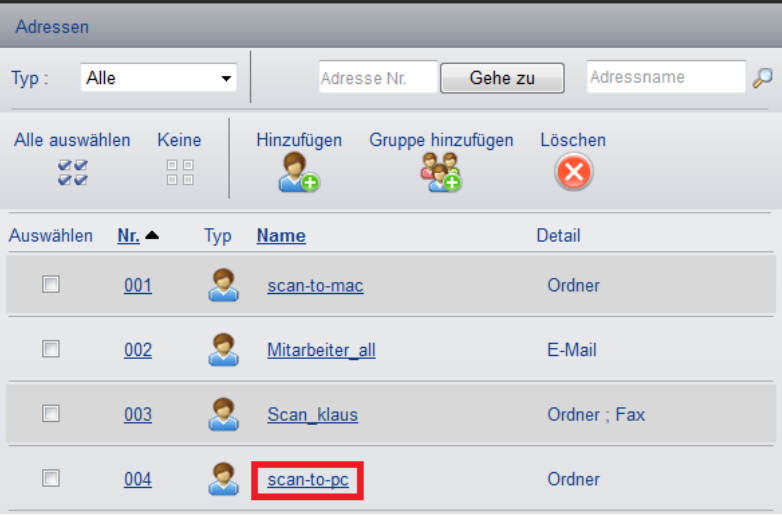
Testing the connection:
Open the previously created address book entry again by clicking on the name. In our example: “scan-to-pc”

Now click on the “Test” button.
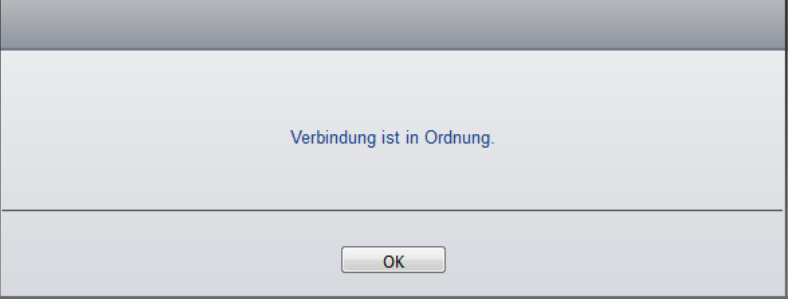
After a few moments this message should appear.
The “Scan-to-SMB” setup is now complete.
Request KYOCERA support
To request Kyocera support, please click on the button below to access our service centre.
